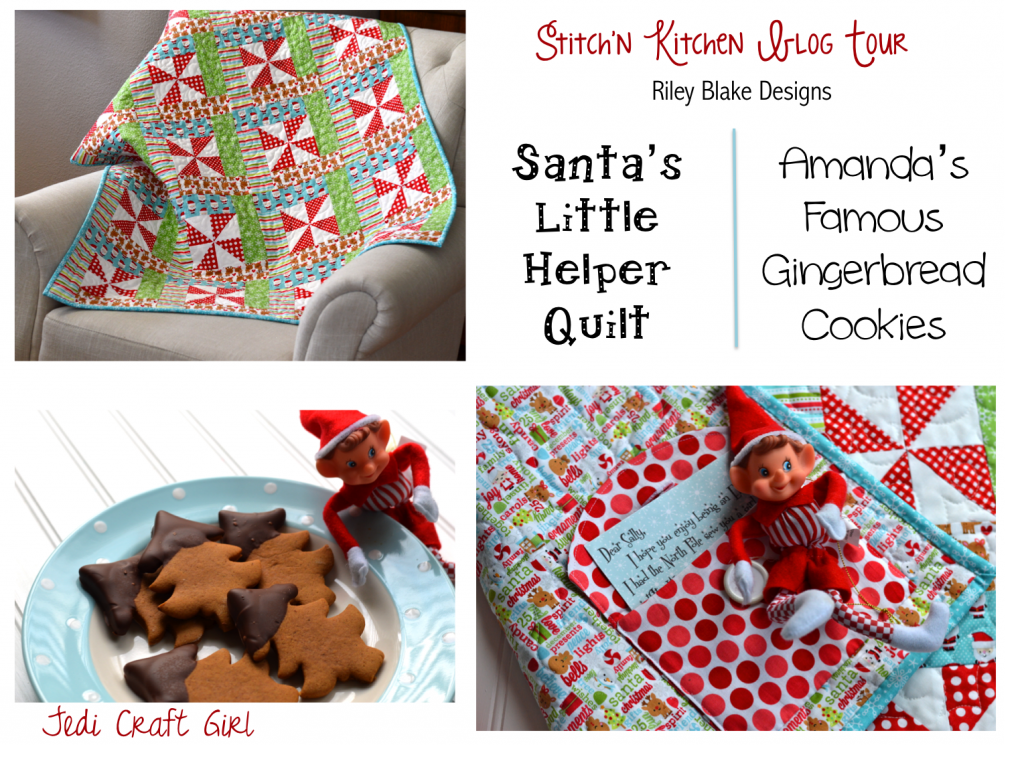
 Hey good lookin’! Whatcha got cookin’? How ’bout cookin’ somethin’ up for me!
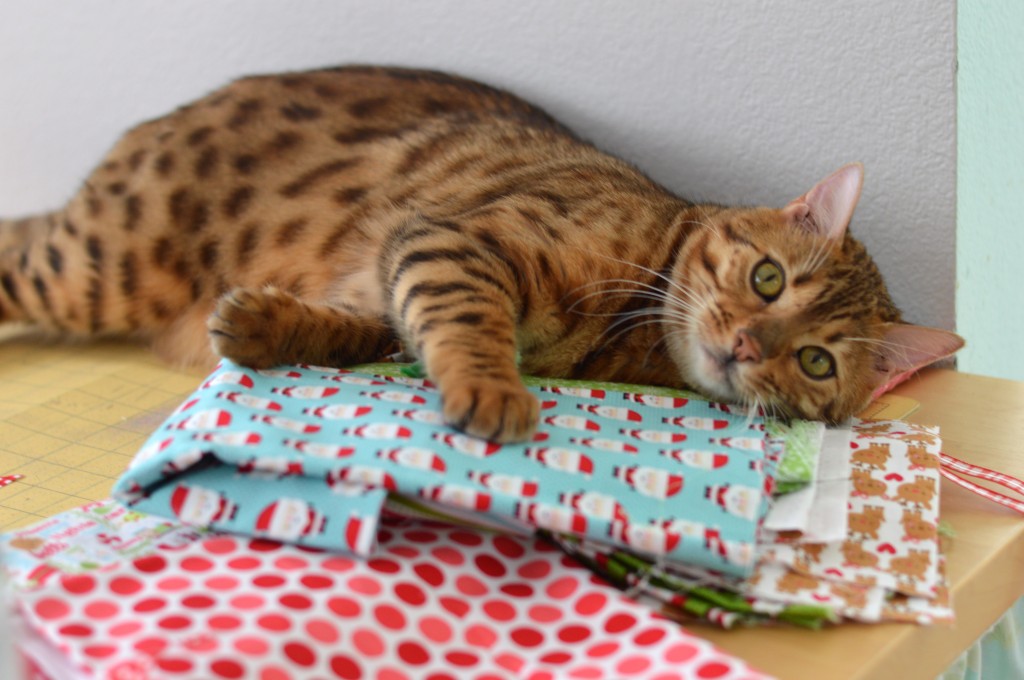
 I’m so excited to be participating in Riley Blake’s Stitchin’ Kitchen blog tour! Thanks for stopping by and welcome to my little corner of blog land!!! I’m a Southern California mom who loves cats, quilting and sewing!! You can follow Mufasa and I and our sewing antics on Instagram @jedicraftgirl.
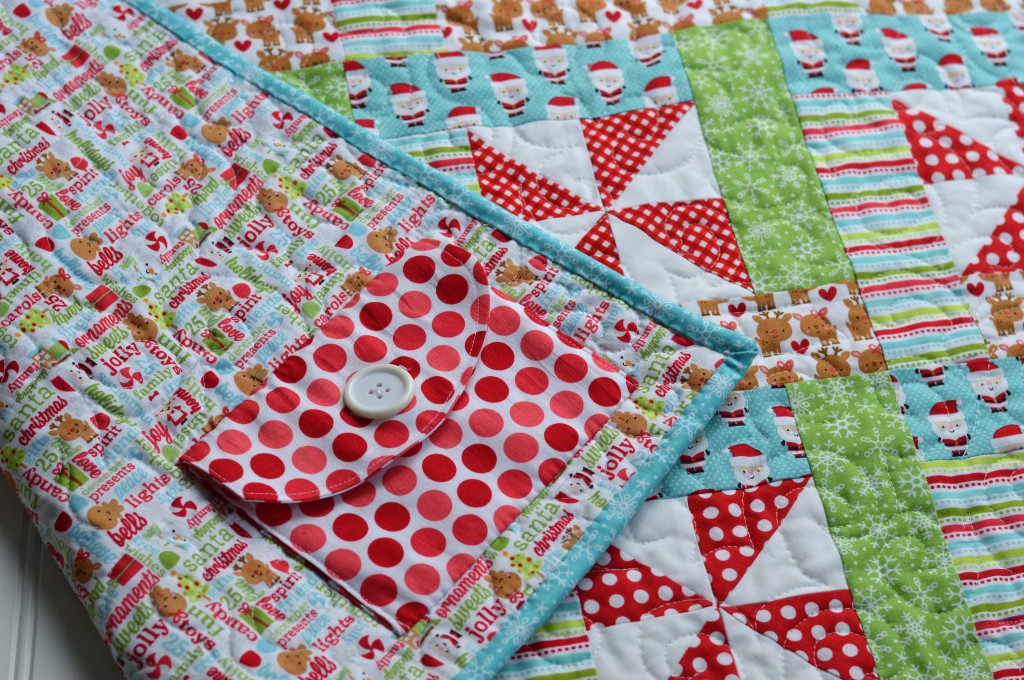
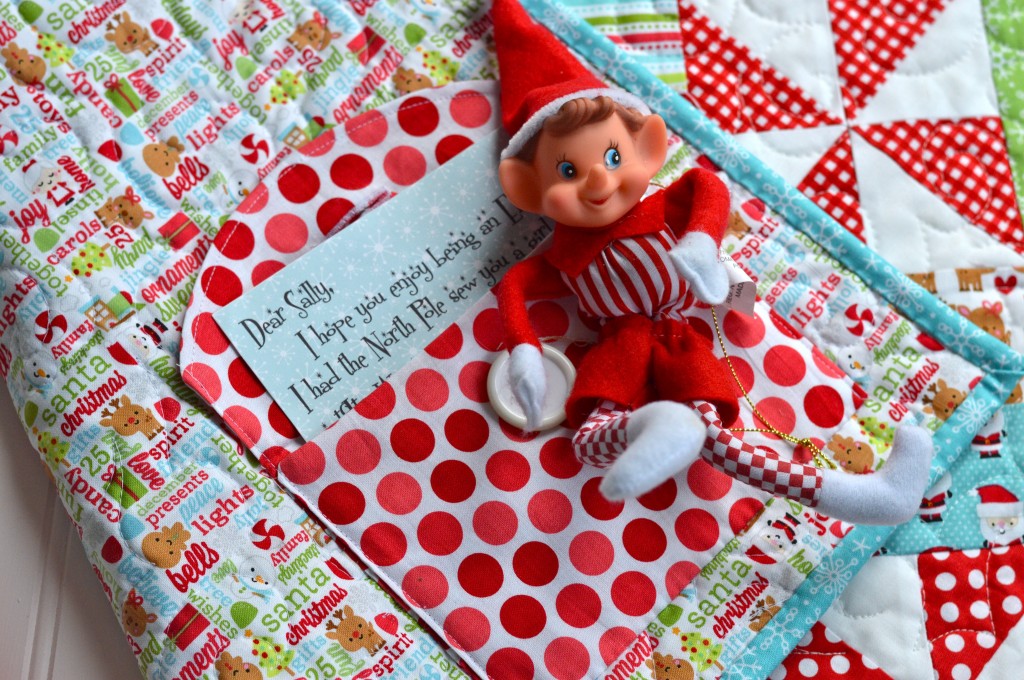
 I love sewing at Christmas time and I am loving all the amazing projects everyone is creating as part of the Riley Blake Stitchin’ Kitchen Blog Tour! I created this fun little throw quilt with inspiration from our elf, Ritchie. My kids love our Elf and they love writing him little notes. This special Santa’s Little Helper Quilt has a pocket on the back of the quilt for children to leave notes for their elf and for the elf to leave notes in response. It’s a magical quilt and it was created with a little help from some magical elf friends!
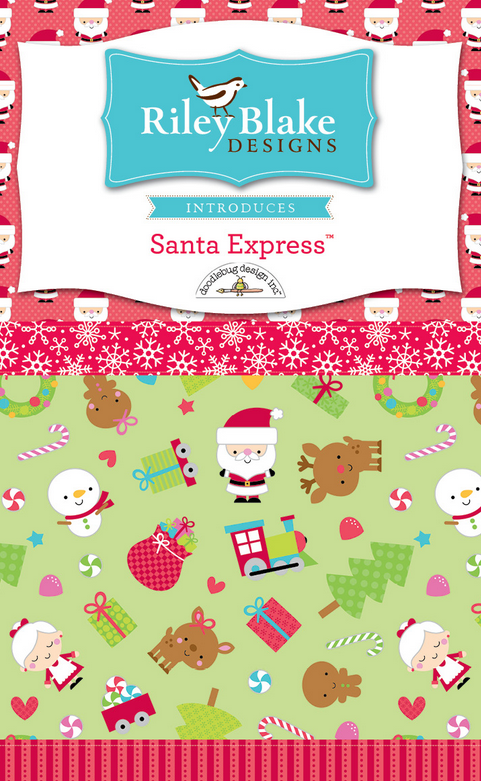
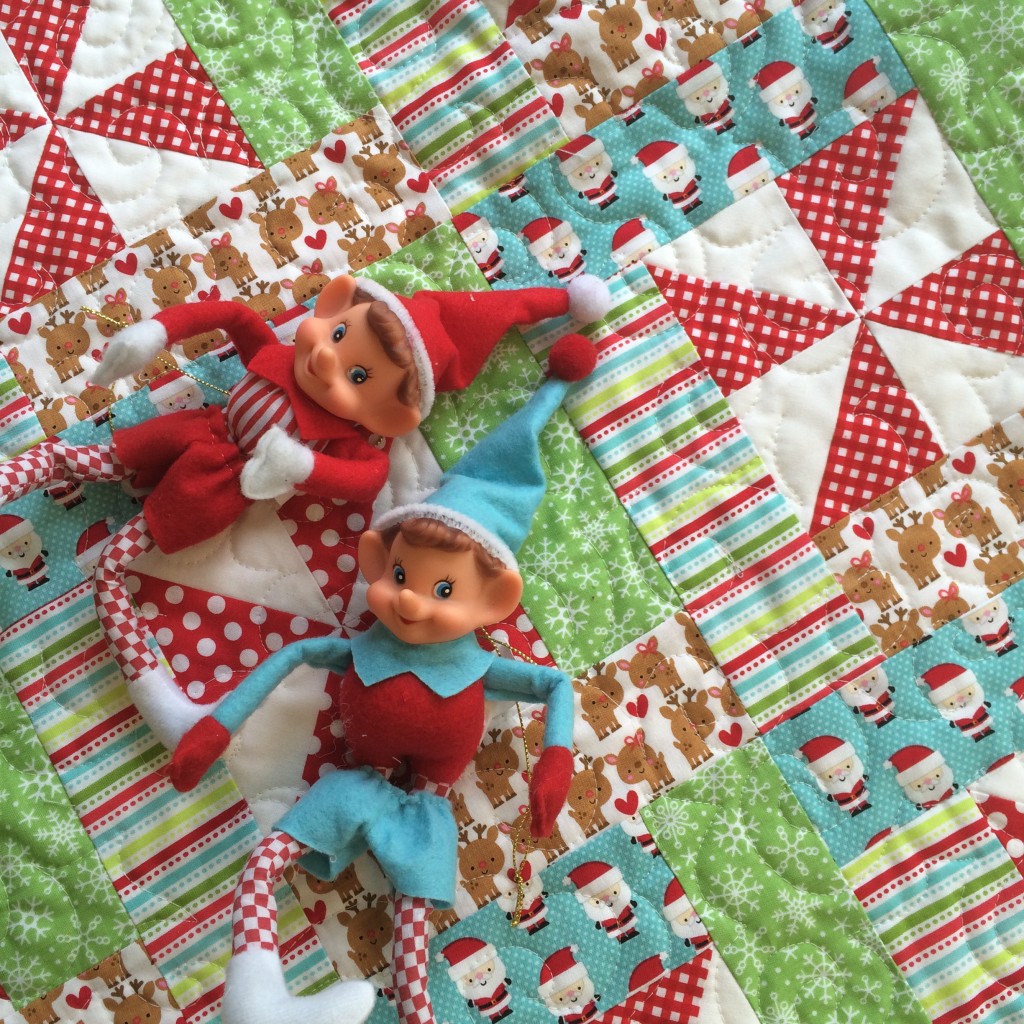 Let’s get cookin’! All fabrics are from the Santa Express fabric line.
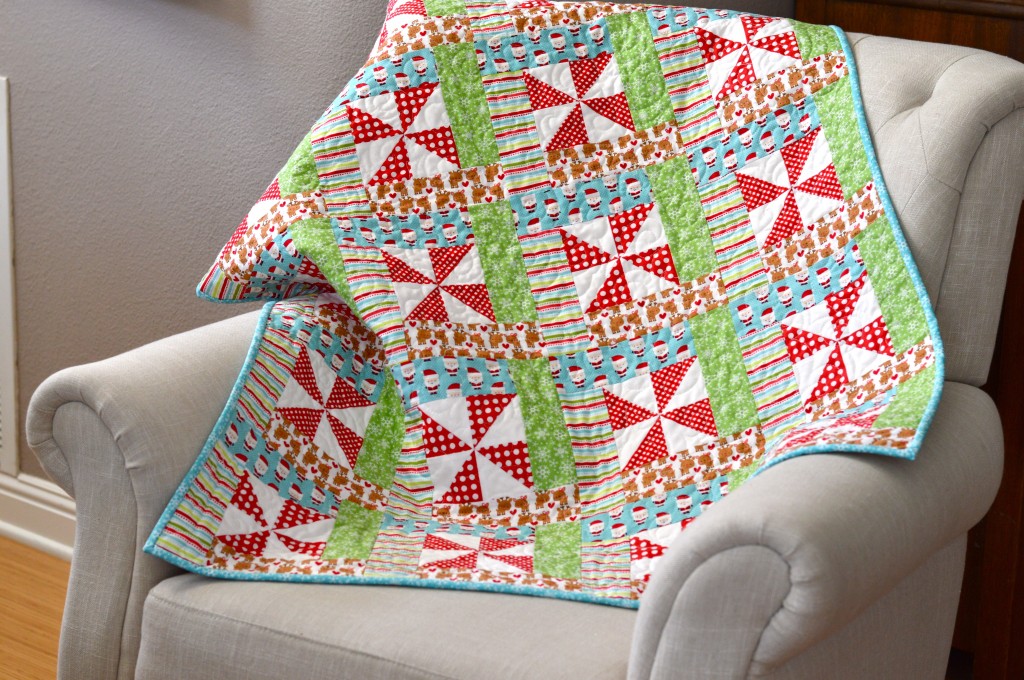 Recipe yields 1 quilt 32″ x 42″
1/4 ” seam allowances
Ingredients
1/4 yard each: blue santa, green snowflake, reindeer, and stripe fabrics for strips
1/3 yard solid white for pinwheels
1/3 yard Riley Blake Basics prints in red
1/4 yard for pocket
1 1/2 yard backing
batting
1/2 yard binding
a sprinkle of elf magic
Directions
Preheat your television to play your favorite Christmas movies while you are bakin’ up this project!
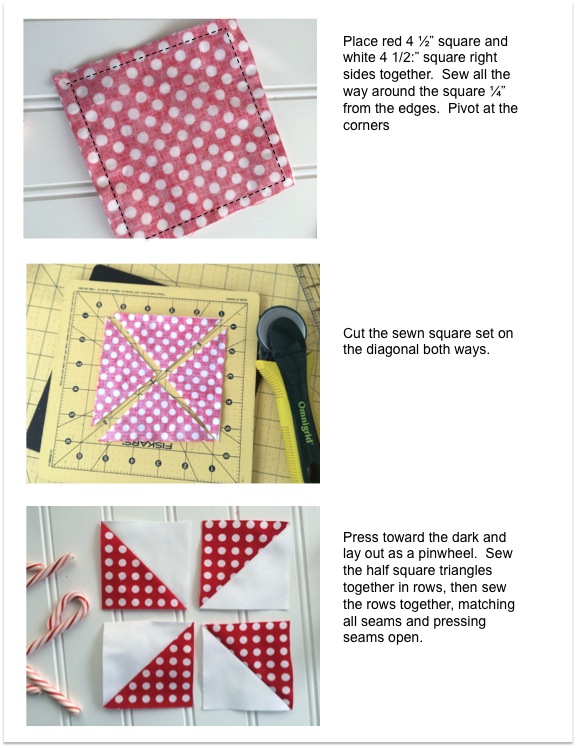
Begin by cutting the red basics and the solid white fabrics into 4 1/2″ squares. You will need 20 of each.
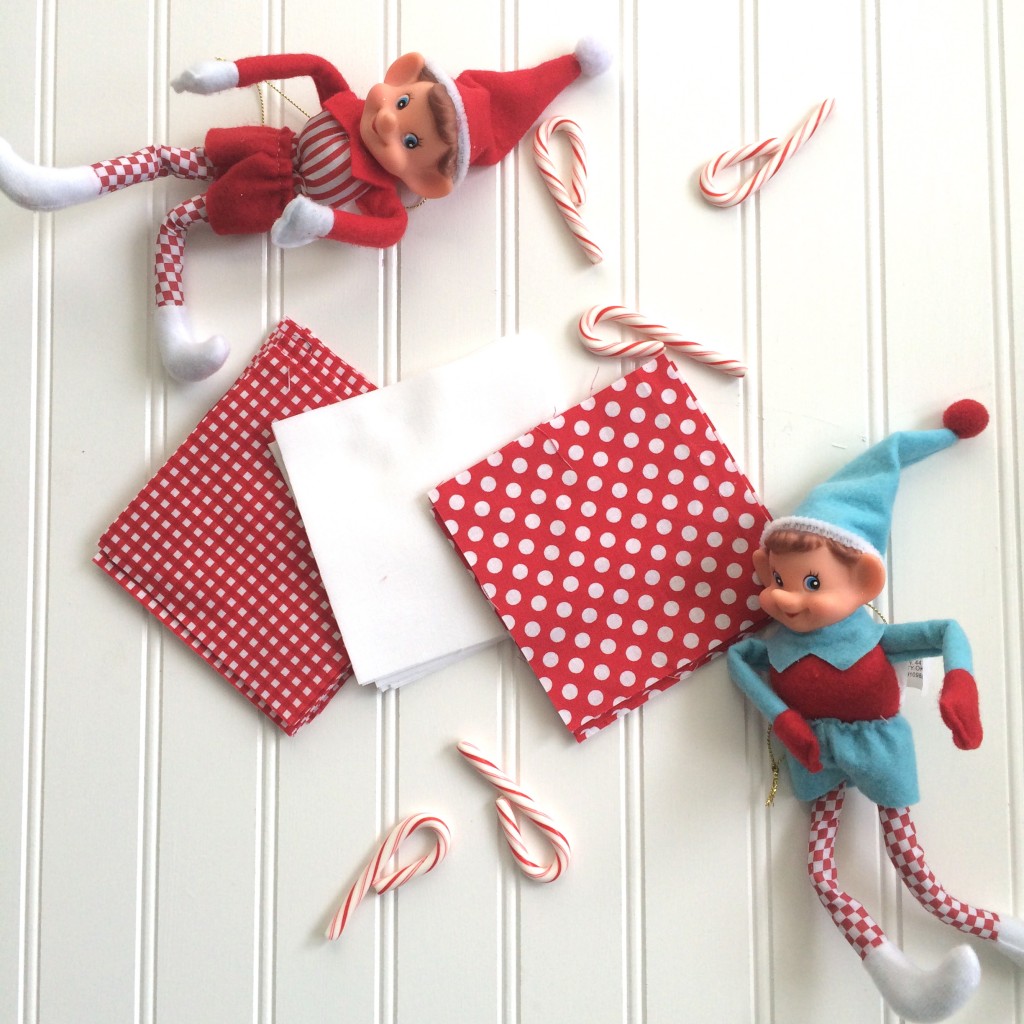 Using a sprinkling of elf magic use the directions below to create some magical half square triangles.
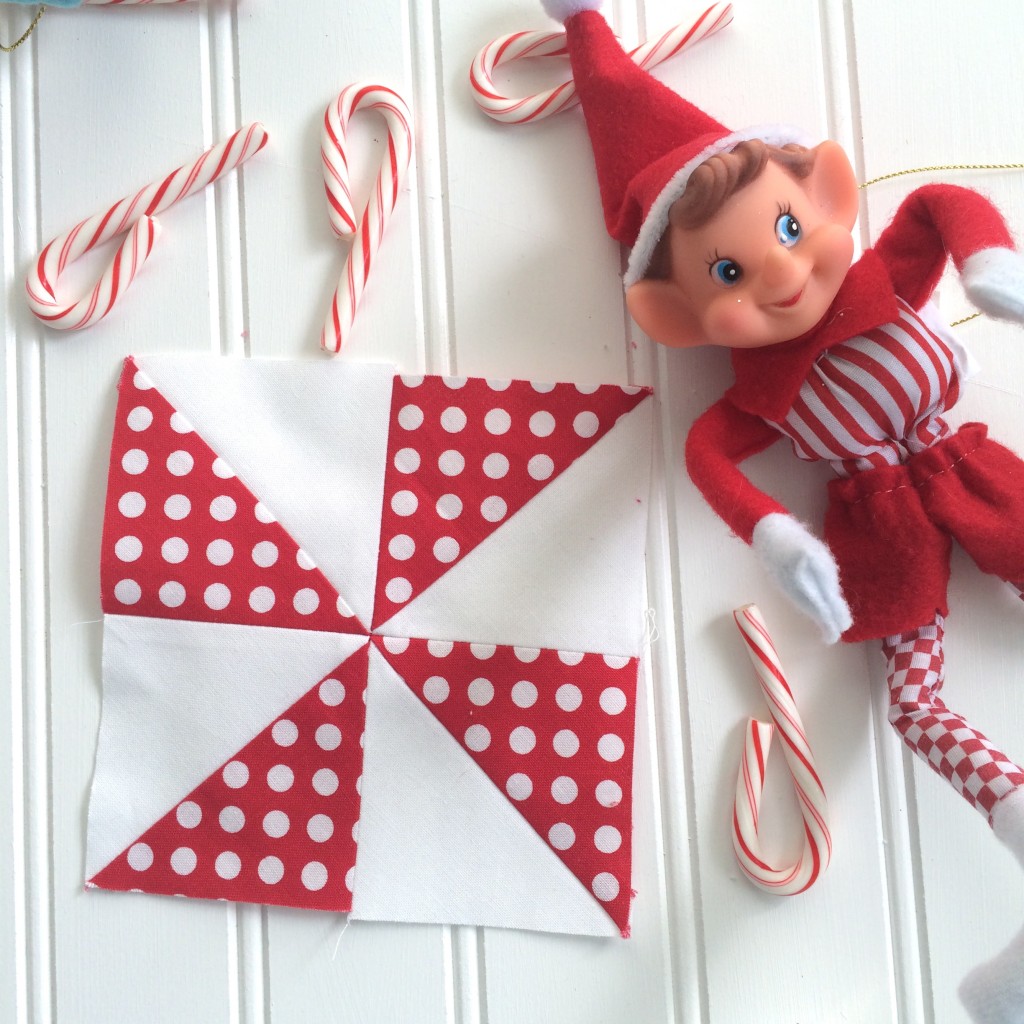
It’s almost like magic how the half square triangles appear! Make sure to cut off the little “dog ears” of the pinwheels.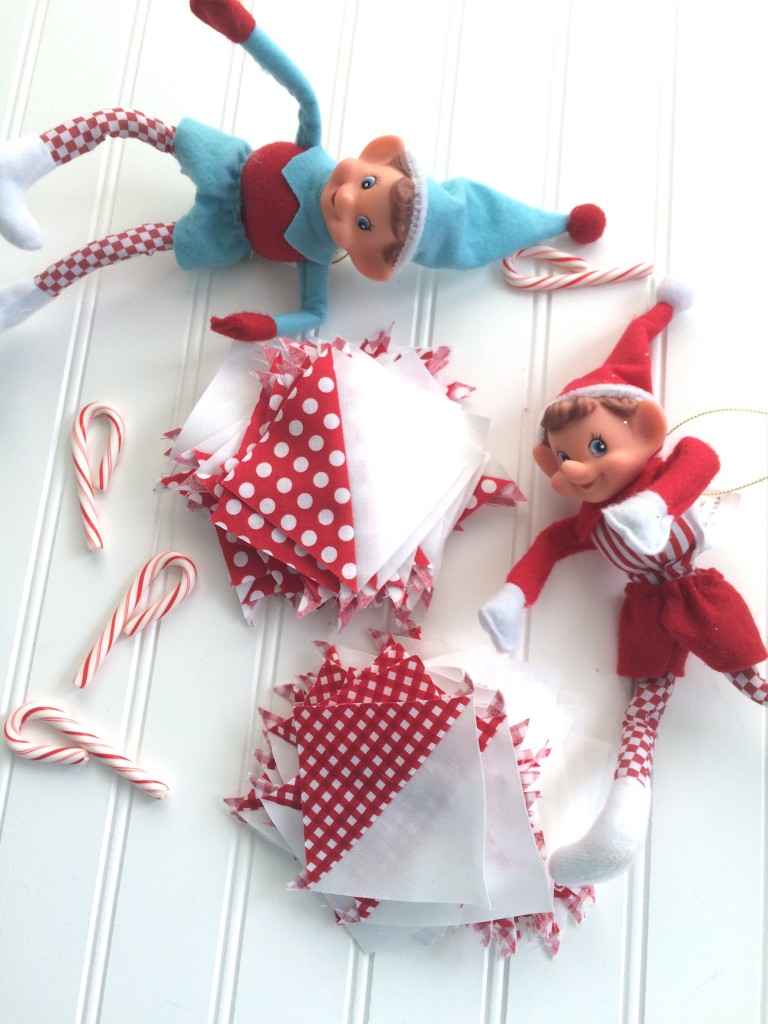 Pressing the seams open helps the pinwheel lay flat.
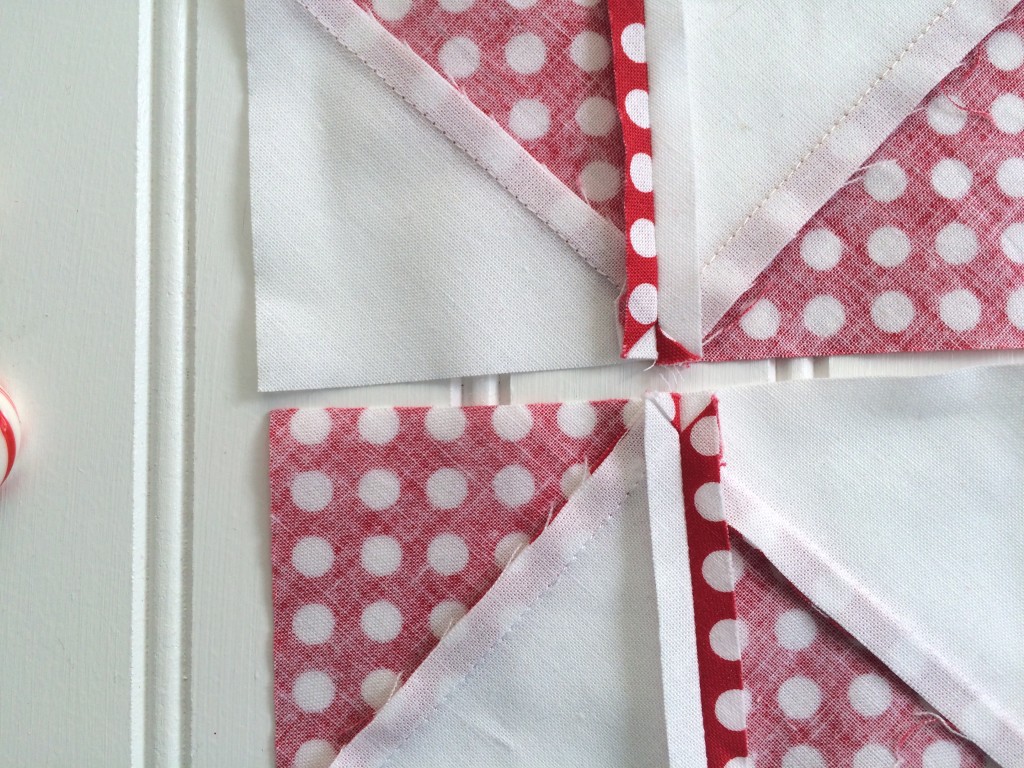
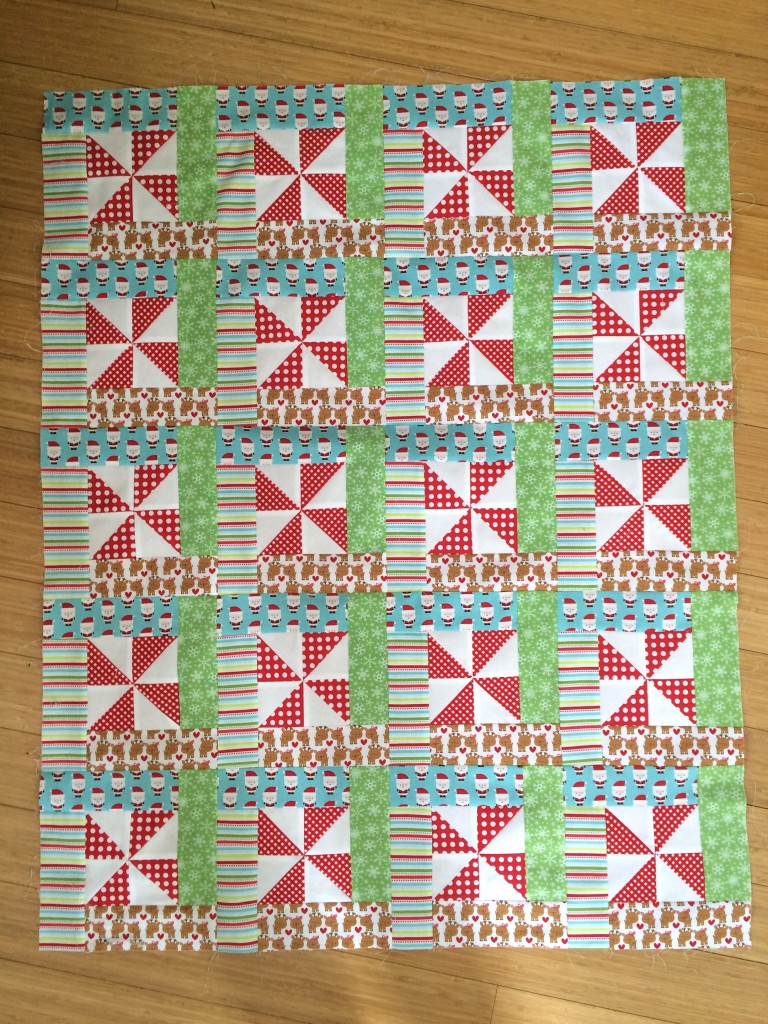
Once you have pinwheel blocks constructed (dry ingredients) you can now add them to the side strips (wet ingredients).
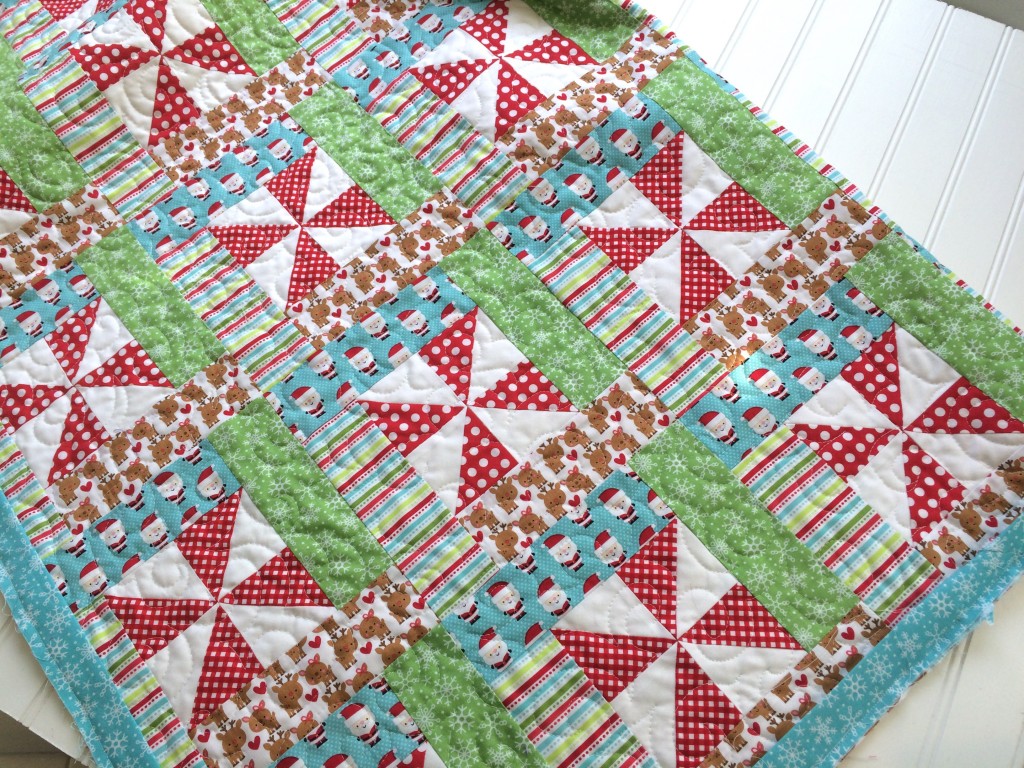
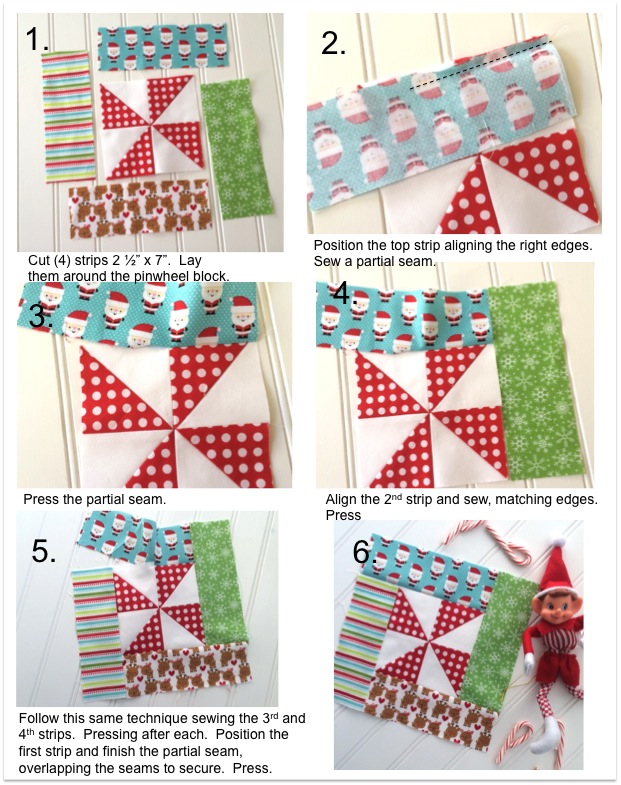 Sewing blocks with partial seems also seems a little magical! Lay the 20 blocks out and sew them together in rows. Pressing seams alternately and pinning at intersections.
Quilt as desired 
 To make the little envelope for the back, follow the instructions below:
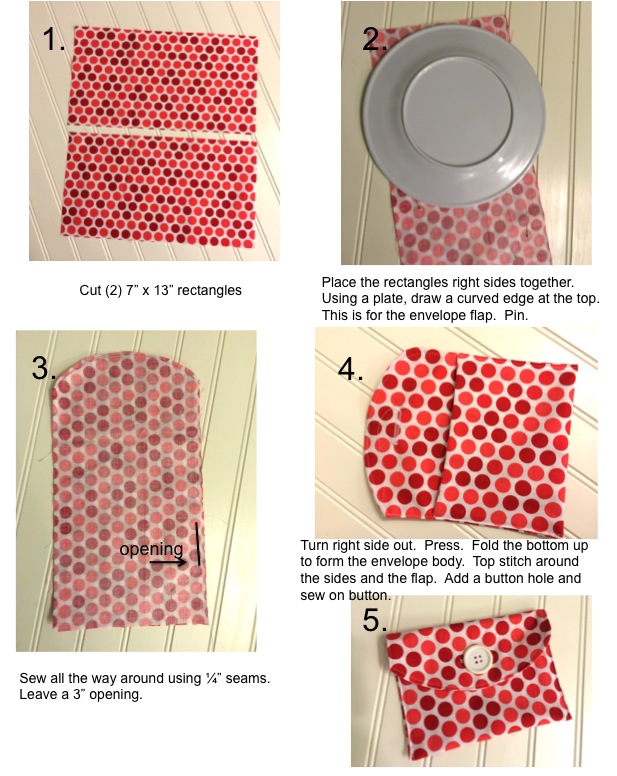 Hand stitch the envelope on the back of the quilt as you would hand applique a quilt label or applique piece.
I just love this little pocket! You could use this same idea for a tooth fairy quilt!!
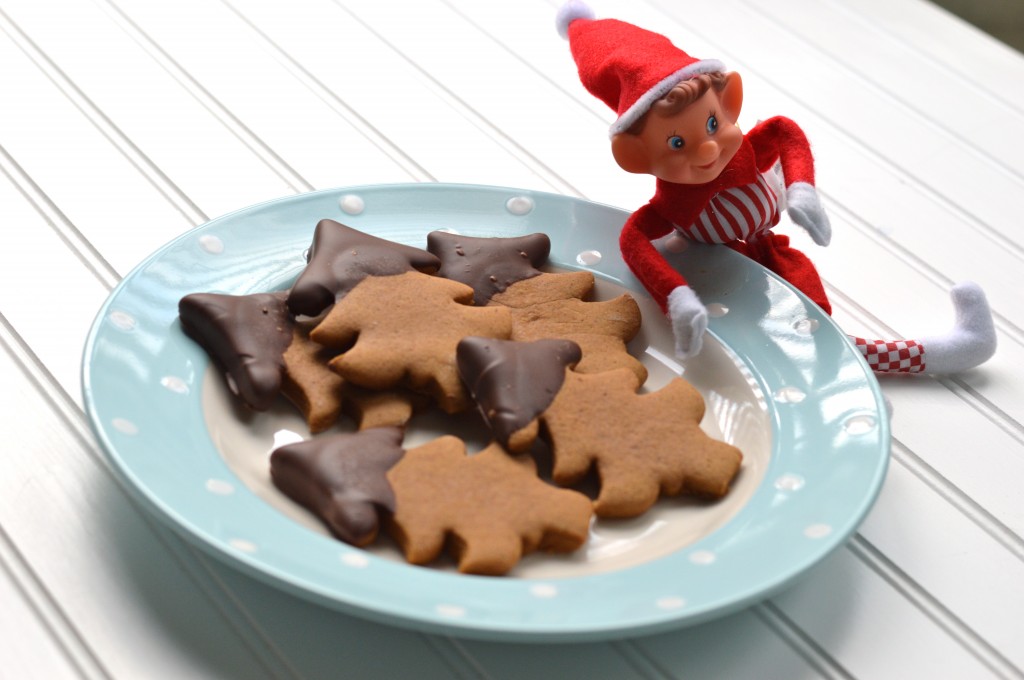
With the quilt all finished, it’s time to enjoy some homemade gingerbread cookies! These are my family’s favorite! We’ve been making this recipe every year since I was in Kindergarten!
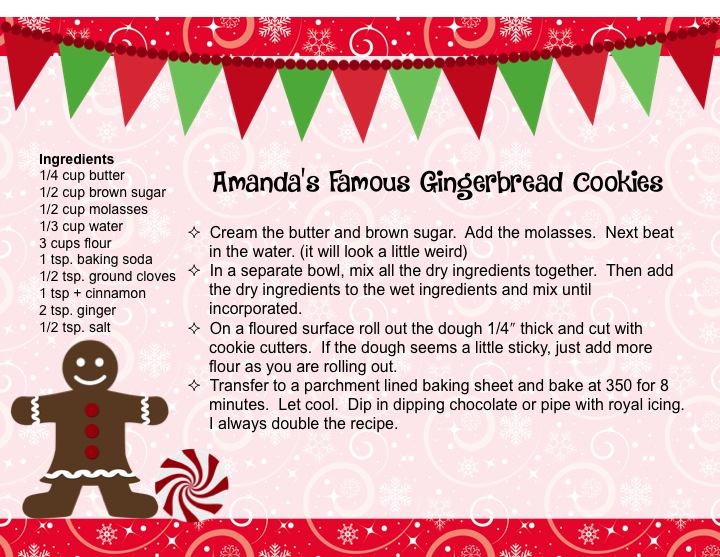 They are so spicy and yummy and your house will smell delightful!!!
Be sure to follow along with our Stitch ‘n Kitchen blog tour for holiday project tutorials and favorite recipes!
12/1 – Riley Blake Designs
12/2 – Simple Simon
12/3 – Mode de Lis
12/4 – One Little Pooh
12/5 – A Bright Corner
12/7 – Quiltscapes
12/8 – Life After Laundry
12/9 – Crafting Chicks
12/10 – Melly Sews
12/11 – Choo Choo Skadoo
12/12 – Jedi Craft Girl
12/14 – Polka Dot Chair
12/15 – Sew Like My Mom
12/16 – Sugar Bee Crafts
12/17 – Fort Worth Fabric Studio
12/18 – Messy Jesse
12/19 – Leigh Laurel Studios
12/21 – The Happy Housie
12/22 – The Flannel Queen
12/23 – Riley Blake Designs
12/24 – Riley Blake Designs
12/25 – Riley Blake Designs



Speak Your Mind